Product Details
Featuring silicone dimples on a silicone-coated fabric, the JemmSil™ 812 Dimpled Release Tape offers the highest release of all of Jemmco's full line of tapes. With its acrylic adhesive, in comparison to traditional silicone adhesives, the JemmSil™ 812 makes clean up a breeze by eliminating oozing and sticky residue left behind by silicone adhesives.
This premium tape has an optimized release coat to prevent building up of adhesives, inks and coatings on rollers or drums, even for transfer adhesive film. The high adhesion guarantees a safe bonding to rollers or drums.
Features
- Excellent release properties
- Temperature, media and moisture resistant adhesive
- Free of solvents
- Easy cleaning of rollers and drums after removal of tape
Technical Specifications
| Release Properties |
Very Good |
| Traction Properties |
Very Good |
| Heat Resistance |
-40°F to 257°F (-40°C to 125°C) |
| Wear Resistance |
Good |
| Hardness |
N/A |
| Adhesive Type |
Acrylic |
| Surface Finish |
Dimpled |
| Wall Thickness |
0.55 mm |
| Available Widths |
2.0" |
| Available Lengths |
27.5 yards |
| Liner |
No |
| FDA Compliant |
No |
Installation
Four Simple Steps for In-Plant Tape Installation!
- 1.
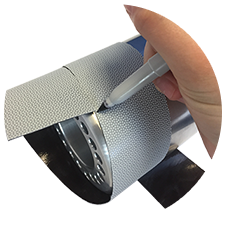
To get started, wrap your Jemmco tape one full rotation around the roller at the angle required to achieve your spiral. Make a mark on the second wrap where it meets the beginning of the tape.
- 2.
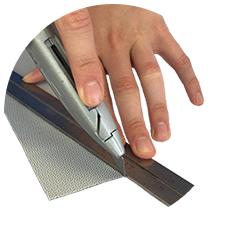
Lay the tape on a flat cutting surface and cut the tape at an angle from the marked point to the opposite corner of the beginning of the tape roll.
- 3.
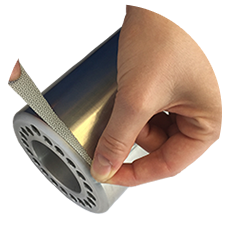
If applicable, remove the liner at the start point and begin wrapping the tape at the edge of the roller.
- 4.
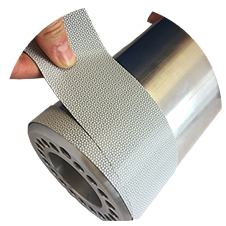
Wrap the tape around the roller - at even angles - without leaving any gaps or air underneath the tape.


